Three months ago I moved my website and blog manuelgruber.com to a static Jekyll site. It’s a great system to post articles without a heavy web system like Wordpress in the background. You just use plain text files and then create html files with one easy command. For text formatting you can use Markdown, an easy syntax for plain text.
Table of contents
- Don’t use Github pages for publishing
- Solution for automated publishing
- Live and test website (PRO and REL)
- Use CI and CD for automation
- Step 1: AWS
- Step 2: Wercker
- Step 3: Prepare repository
- Summary
Don’t use Github pages for publishing
Jekyll was created by Tom Preston-Werner, the founder of Github. And a nice feature of Github is the Jekyll support on Github pages. Just push your articles together with a few configuration files and your website is online within seconds. The result: Your website is online without hosting costs and nice Git integration. That sounds great, but there’re some disadvantages and restrictions. The most important reasons why I don’t use Github pages:
- Github pages generates Jekyll sites only in safe mode. That means that it’s not possible to extent Jekyll functions with additional plugins. And a lot of great plugins are available. With different strategies you can bypass the problems, but they’re more or less hacks.
- The advantage that Github handles the hosting is a big disadvantage, too. First the pages hosted on Github are slow, or at least it feels slow. Secondly I want to control hosting or I need to control it in order to optimize speed and performance. Storing the file on AWS S3 and publishing with the CloudFront as CDN is the better solution. The costs for AWS are minimal (I pay 1 USD per month).
- Publishing on Github means the repository is on Github. Using a public repository for my blog I was worried to push article drafts or other stuff where everybody can check it. That’s the reason why I want a private repository. Github charges for private repositories and Bitbucket not. So I store my Jekyll repository on Atlassian’s Bitbucket.
Solution for automated publishing
The source code of my website is in a private repository on BitBucket. And the public site is stored on S3 and the content will be distributed with CloudFront. This article describes the setup of the process to get the website published automated. Modern web development environments use Continuous Deployment / Continuous Delivery (CD) systems. The CD system is watching the BitBucket repository for new commits and running tests afterwards. If passed, the new version of the webpage will be published automatically. The author only interacts with the Git repository and then check if the published website is correct. That’s all.
Live and test website (PRO and REL)
For ManuelGruber.com I’m using two environments, one for the public site for visitors (called PRO for production) and one for internal testing and tweaking (called REL for release candidate). In my repository I created 2 branches PRO and REL, whereas PRO replaced the default Git branch “master”. The result:
- Commit to PRO branch » Deploy on www.manuelgruber.com
- Commit to REL branch » Deploy on www2.manuelgruber.com
In my current setup both urls are public available. That’s fine, nobody knows the second url (btw it’s not www2) and it isn’t indexed by search engines like Google. If you want to hide the content, you can use a service like S3auth to get a kind of Basic auth for S3 hosted websites.
Use CI and CD for automation
Currently a lot great Continuous Integration (CI) and Continuous Delivery (CD) tools like Jenkins, Codeship.io and Wercker.com are available on the market. The creators of Wercker published a tutorial to use their service for Jekyll with an example of the “wercker.yml” configuration file. Here is my step-by-step tutorial for Wercker:
- Go to the Amazon Web Services console (Link)
- Create two AWS S3 buckets, enable static website hosting and setup the CloudFront distributions (not covered in this article).
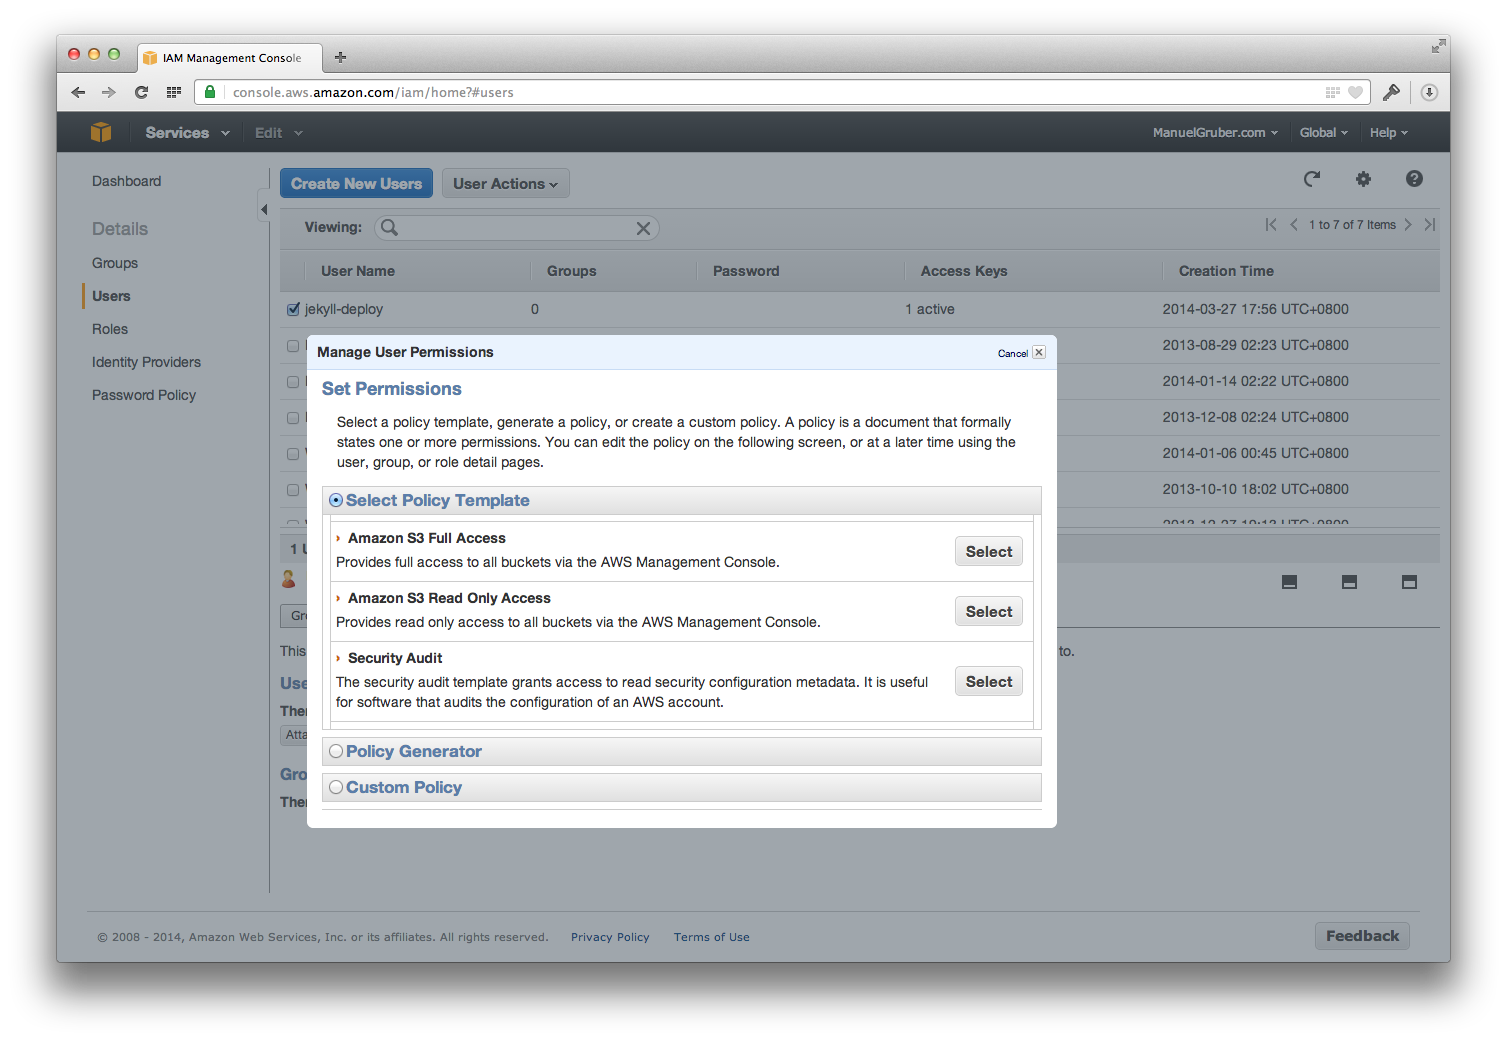
- Create a new IAM user for your AWS account with full access to your S3 buckets. Take a note of the Access Key ID and Secret Access Key of the created user account.
- Go to Wercker (Link)
- Create Wercker account
- Connect your Bitbucket account to Wercker (also possible with Github accounts)
- Select source repository and create app on Wercker
- Create deployment targets for every AWS S3 bucket (I use the targets PRO and REL)
- Add environment variables to Wercker
- Prepare repository
- Add wercker file to your repository
- Modify your cache headers
- Commit your repository to Bitbucket (and check the status on Wercker.com)
- Your website is online and the automated publishing process is working now.
Some steps of the tutorial I explain in more detail here.
Step 1: AWS
Create a new IAM user for your AWS account with full access to your S3 buckets. Take a note of the Access Key ID and Secret Access Key of the created user account.


Step 2: Wercker
Add environment variables
In order to get the automation up and running, you need to specify variables. There’re two kinds of variables, target-specific environment variables are only available at the corresponding deploy target and application-wide variables are available globally for all targets.
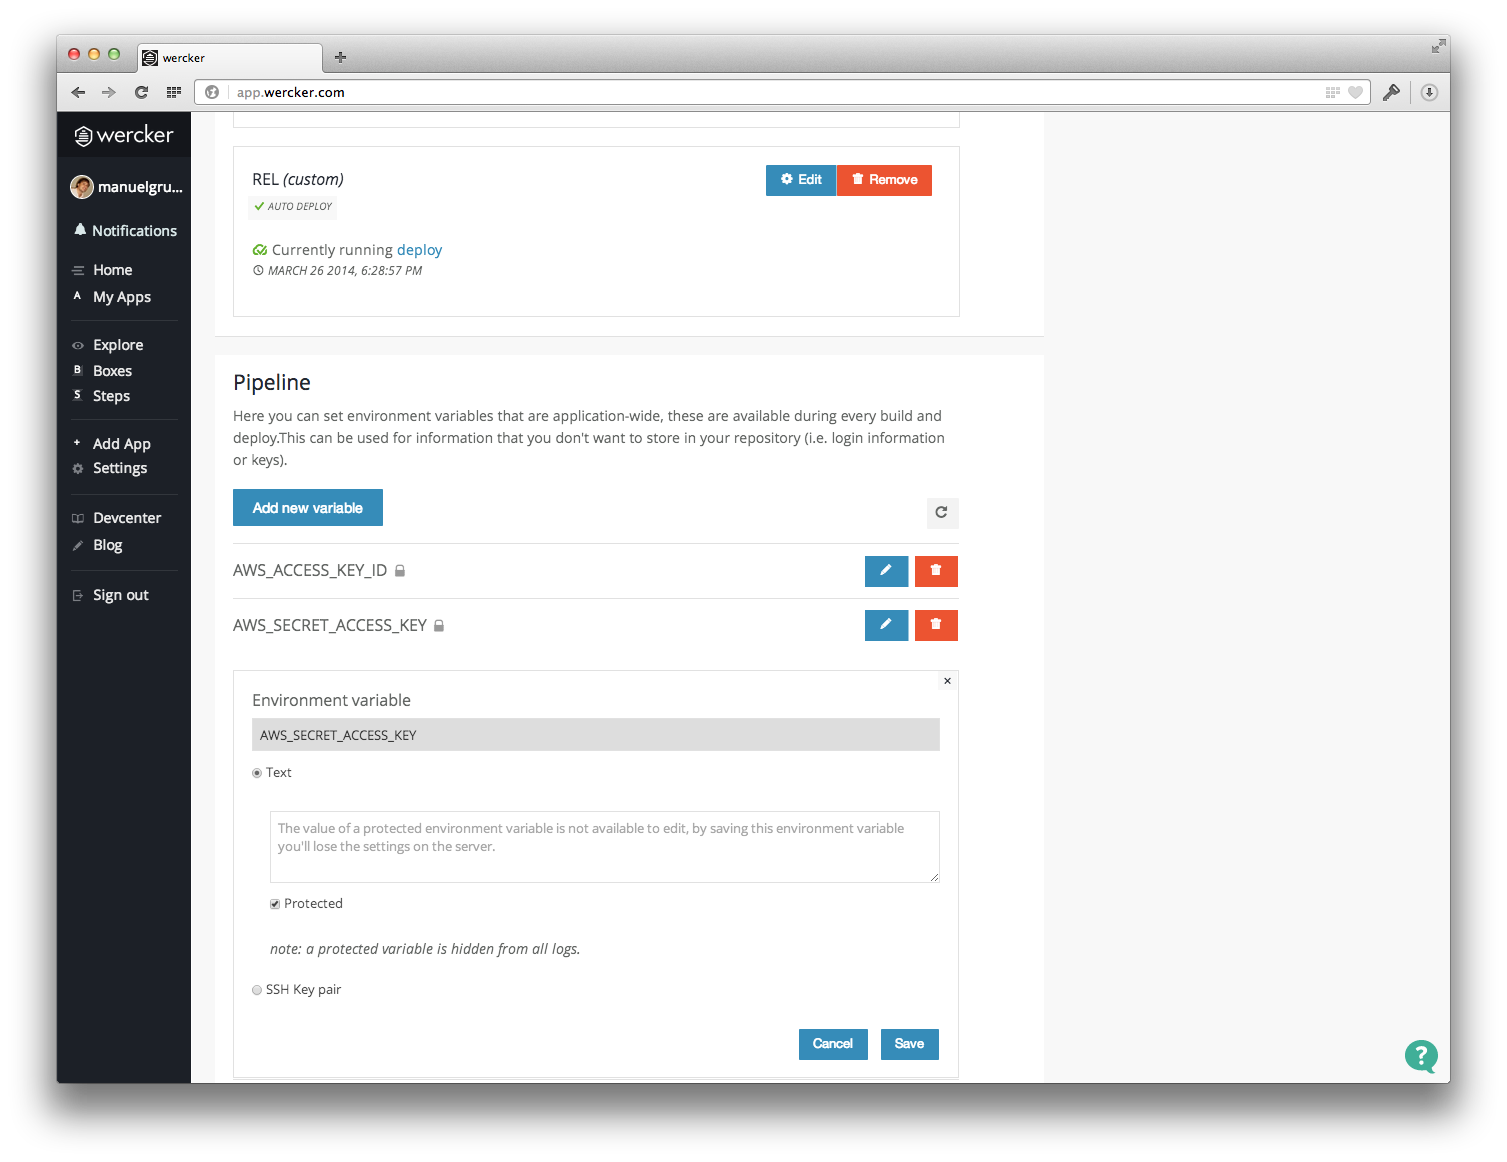
- $AWS_ACCESS_KEY_ID (application-wide)
- $AWS_SECRET_ACCESS_KEY (application-wide)
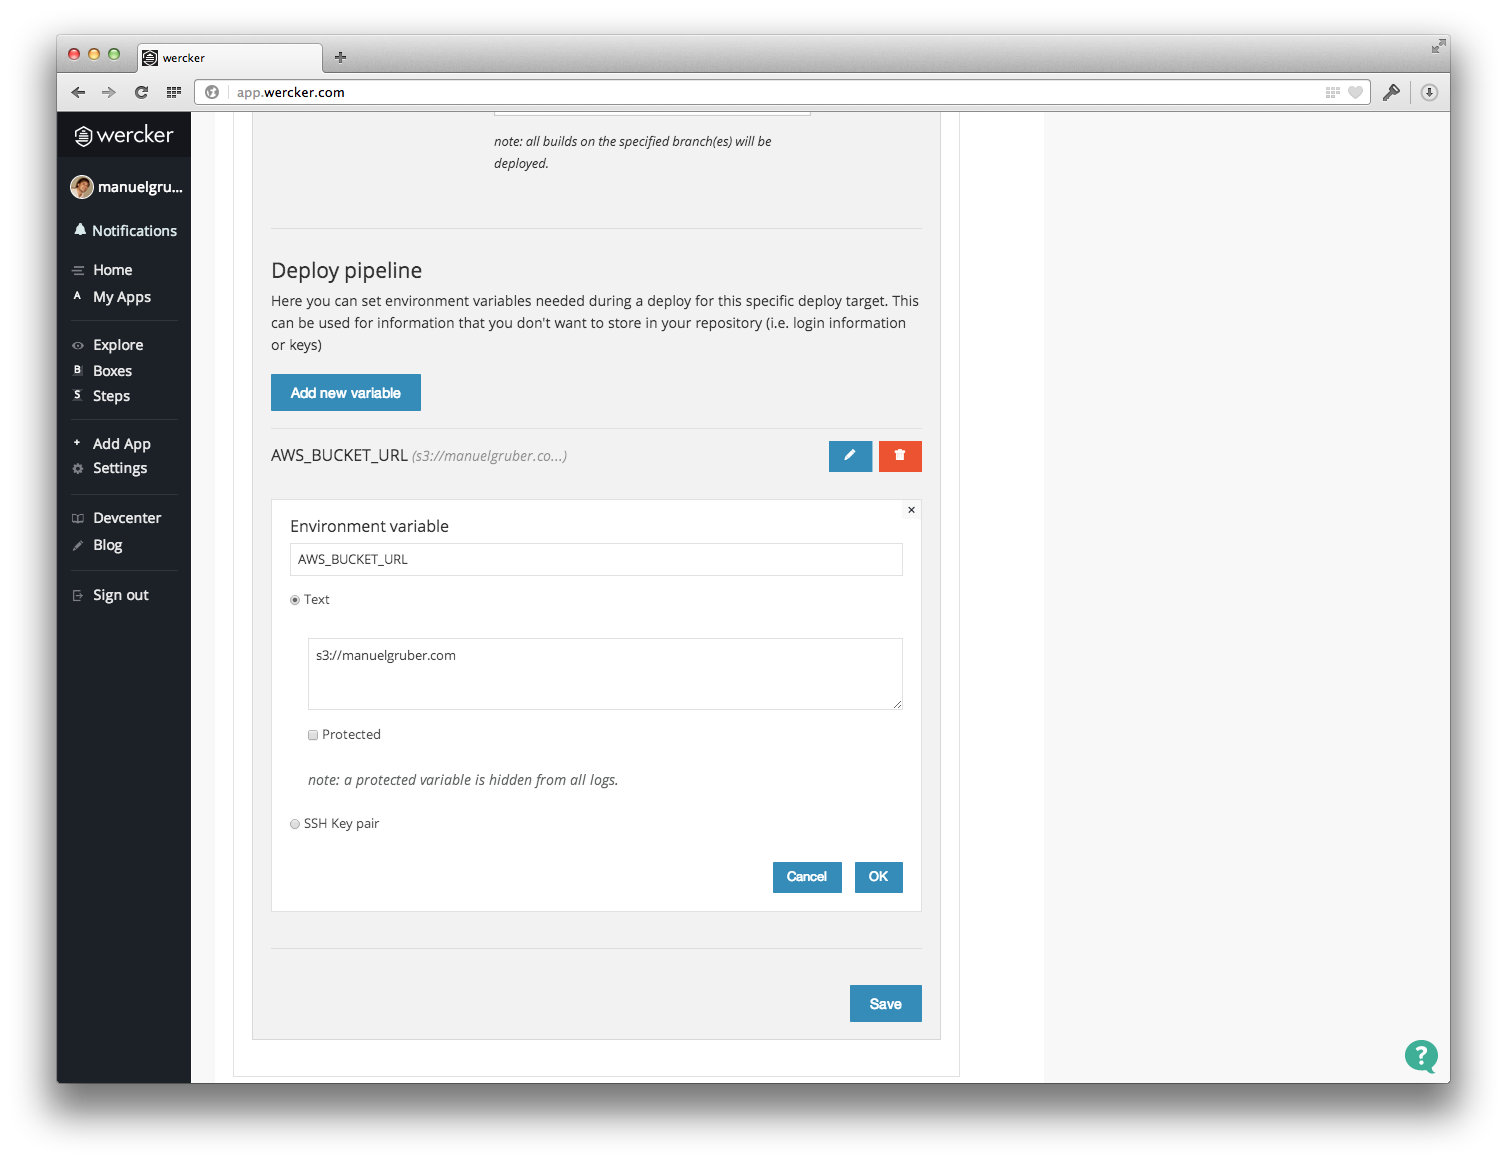
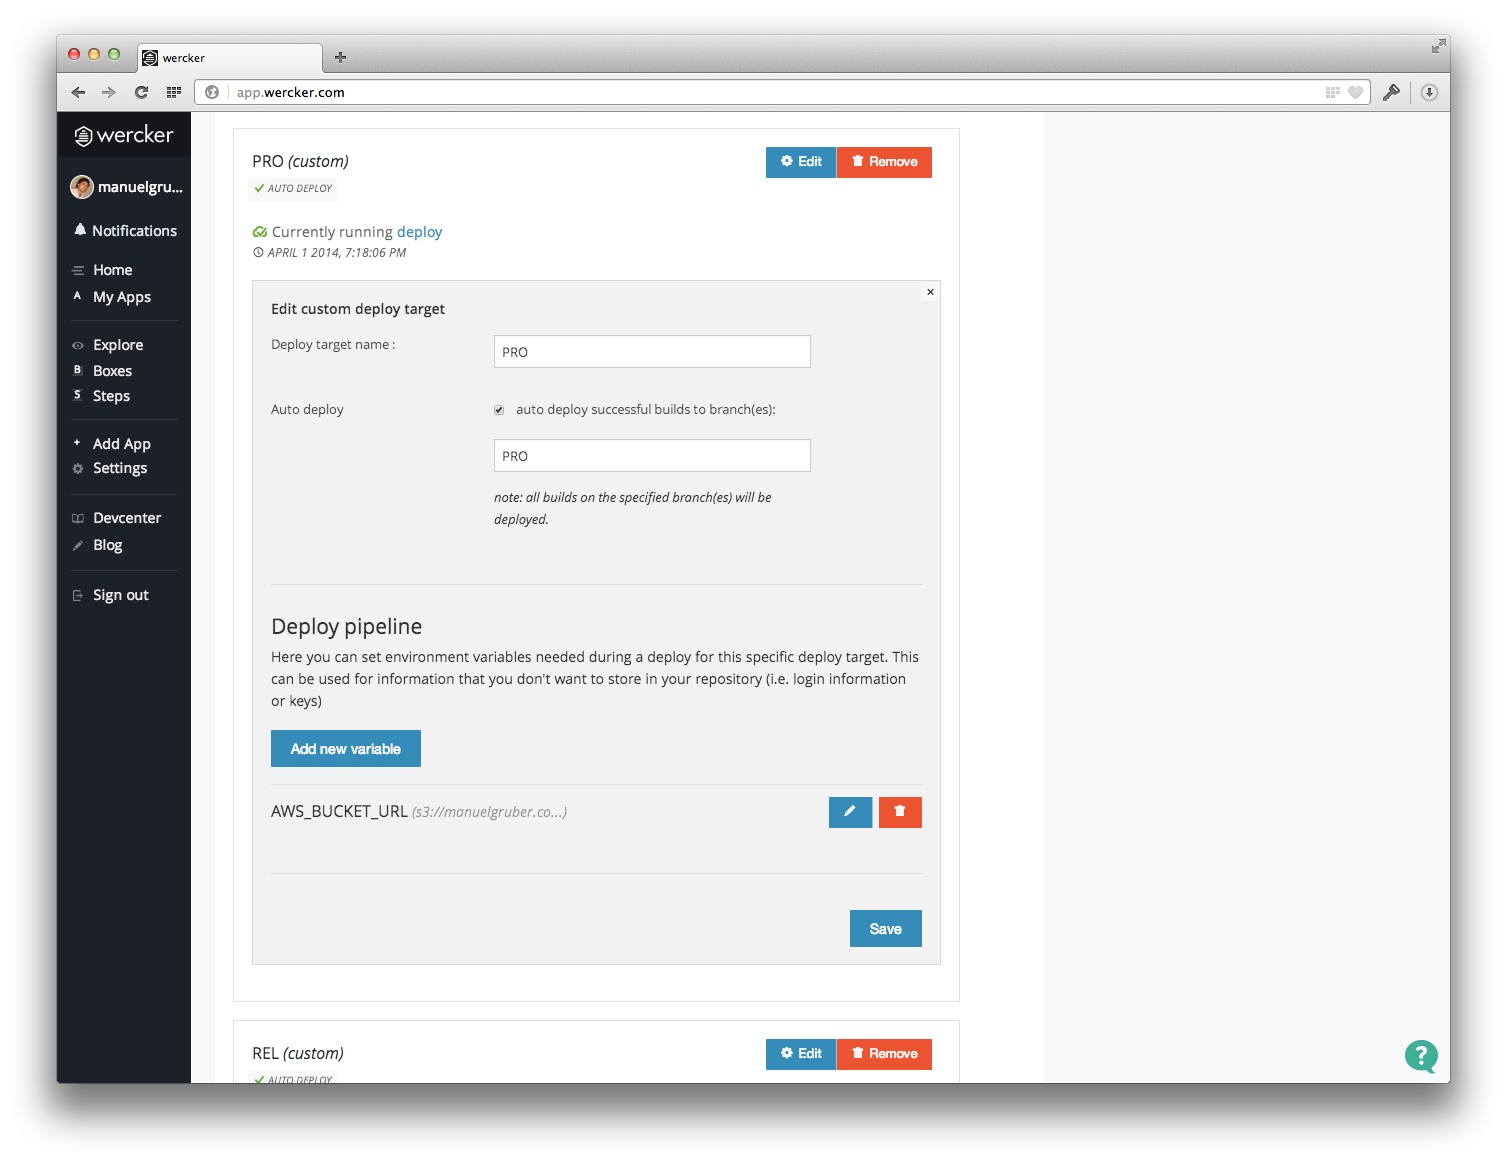
- $AWS_BUCKET_URL (target-specific)
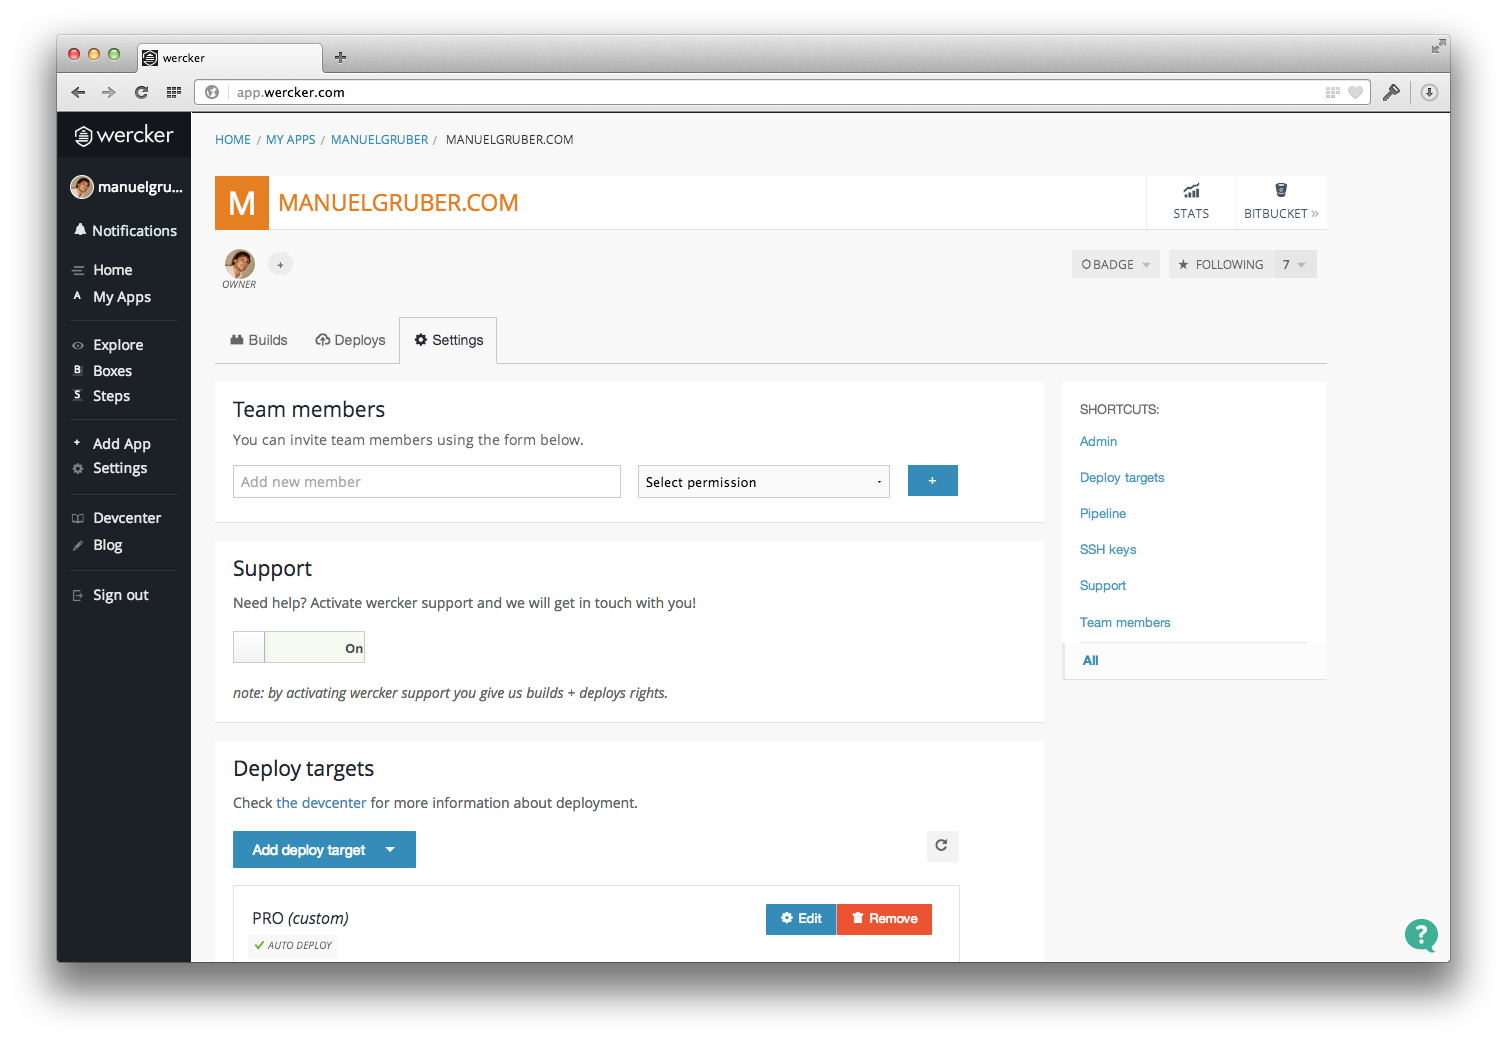
Open the App settings on Wercker and go to “Deploy targets”:
Now you need the AWS IAM user credentials. Add Access Key ID and Secret Access Key as application-wide environment variables (Pipeline settings) to your Wercker App.
Finally add the S3 bucket name as environment variable to the corresponding deploy target. If the bucket name is abc.com, please insert the variable s3://abc.com. For my PRO production target s3://manuelgruber.com is the right variable name.
Step 3: Prepare repository
Configuration file “wercker.yml”
To get started with automated publishing, the configuration file “wercker.yml” needs to be in your repository.
1
2
3
4
5
6
7
8
9
10
11
12
13
14
15
16
17
18
19
box: wercker/ruby
no-response-timeout: 10
build:
steps:
- bundle-install
- script:
name: Run Jekyll doctor
code: bundle exec jekyll doctor
- script:
name: Build Jekyll site
code: bundle exec jekyll build --trace
deploy:
steps:
- s3sync:
key_id: $AWS_ACCESS_KEY_ID
key_secret: $AWS_SECRET_ACCESS_KEY
bucket_url: $AWS_BUCKET_URL
source_dir: _site/
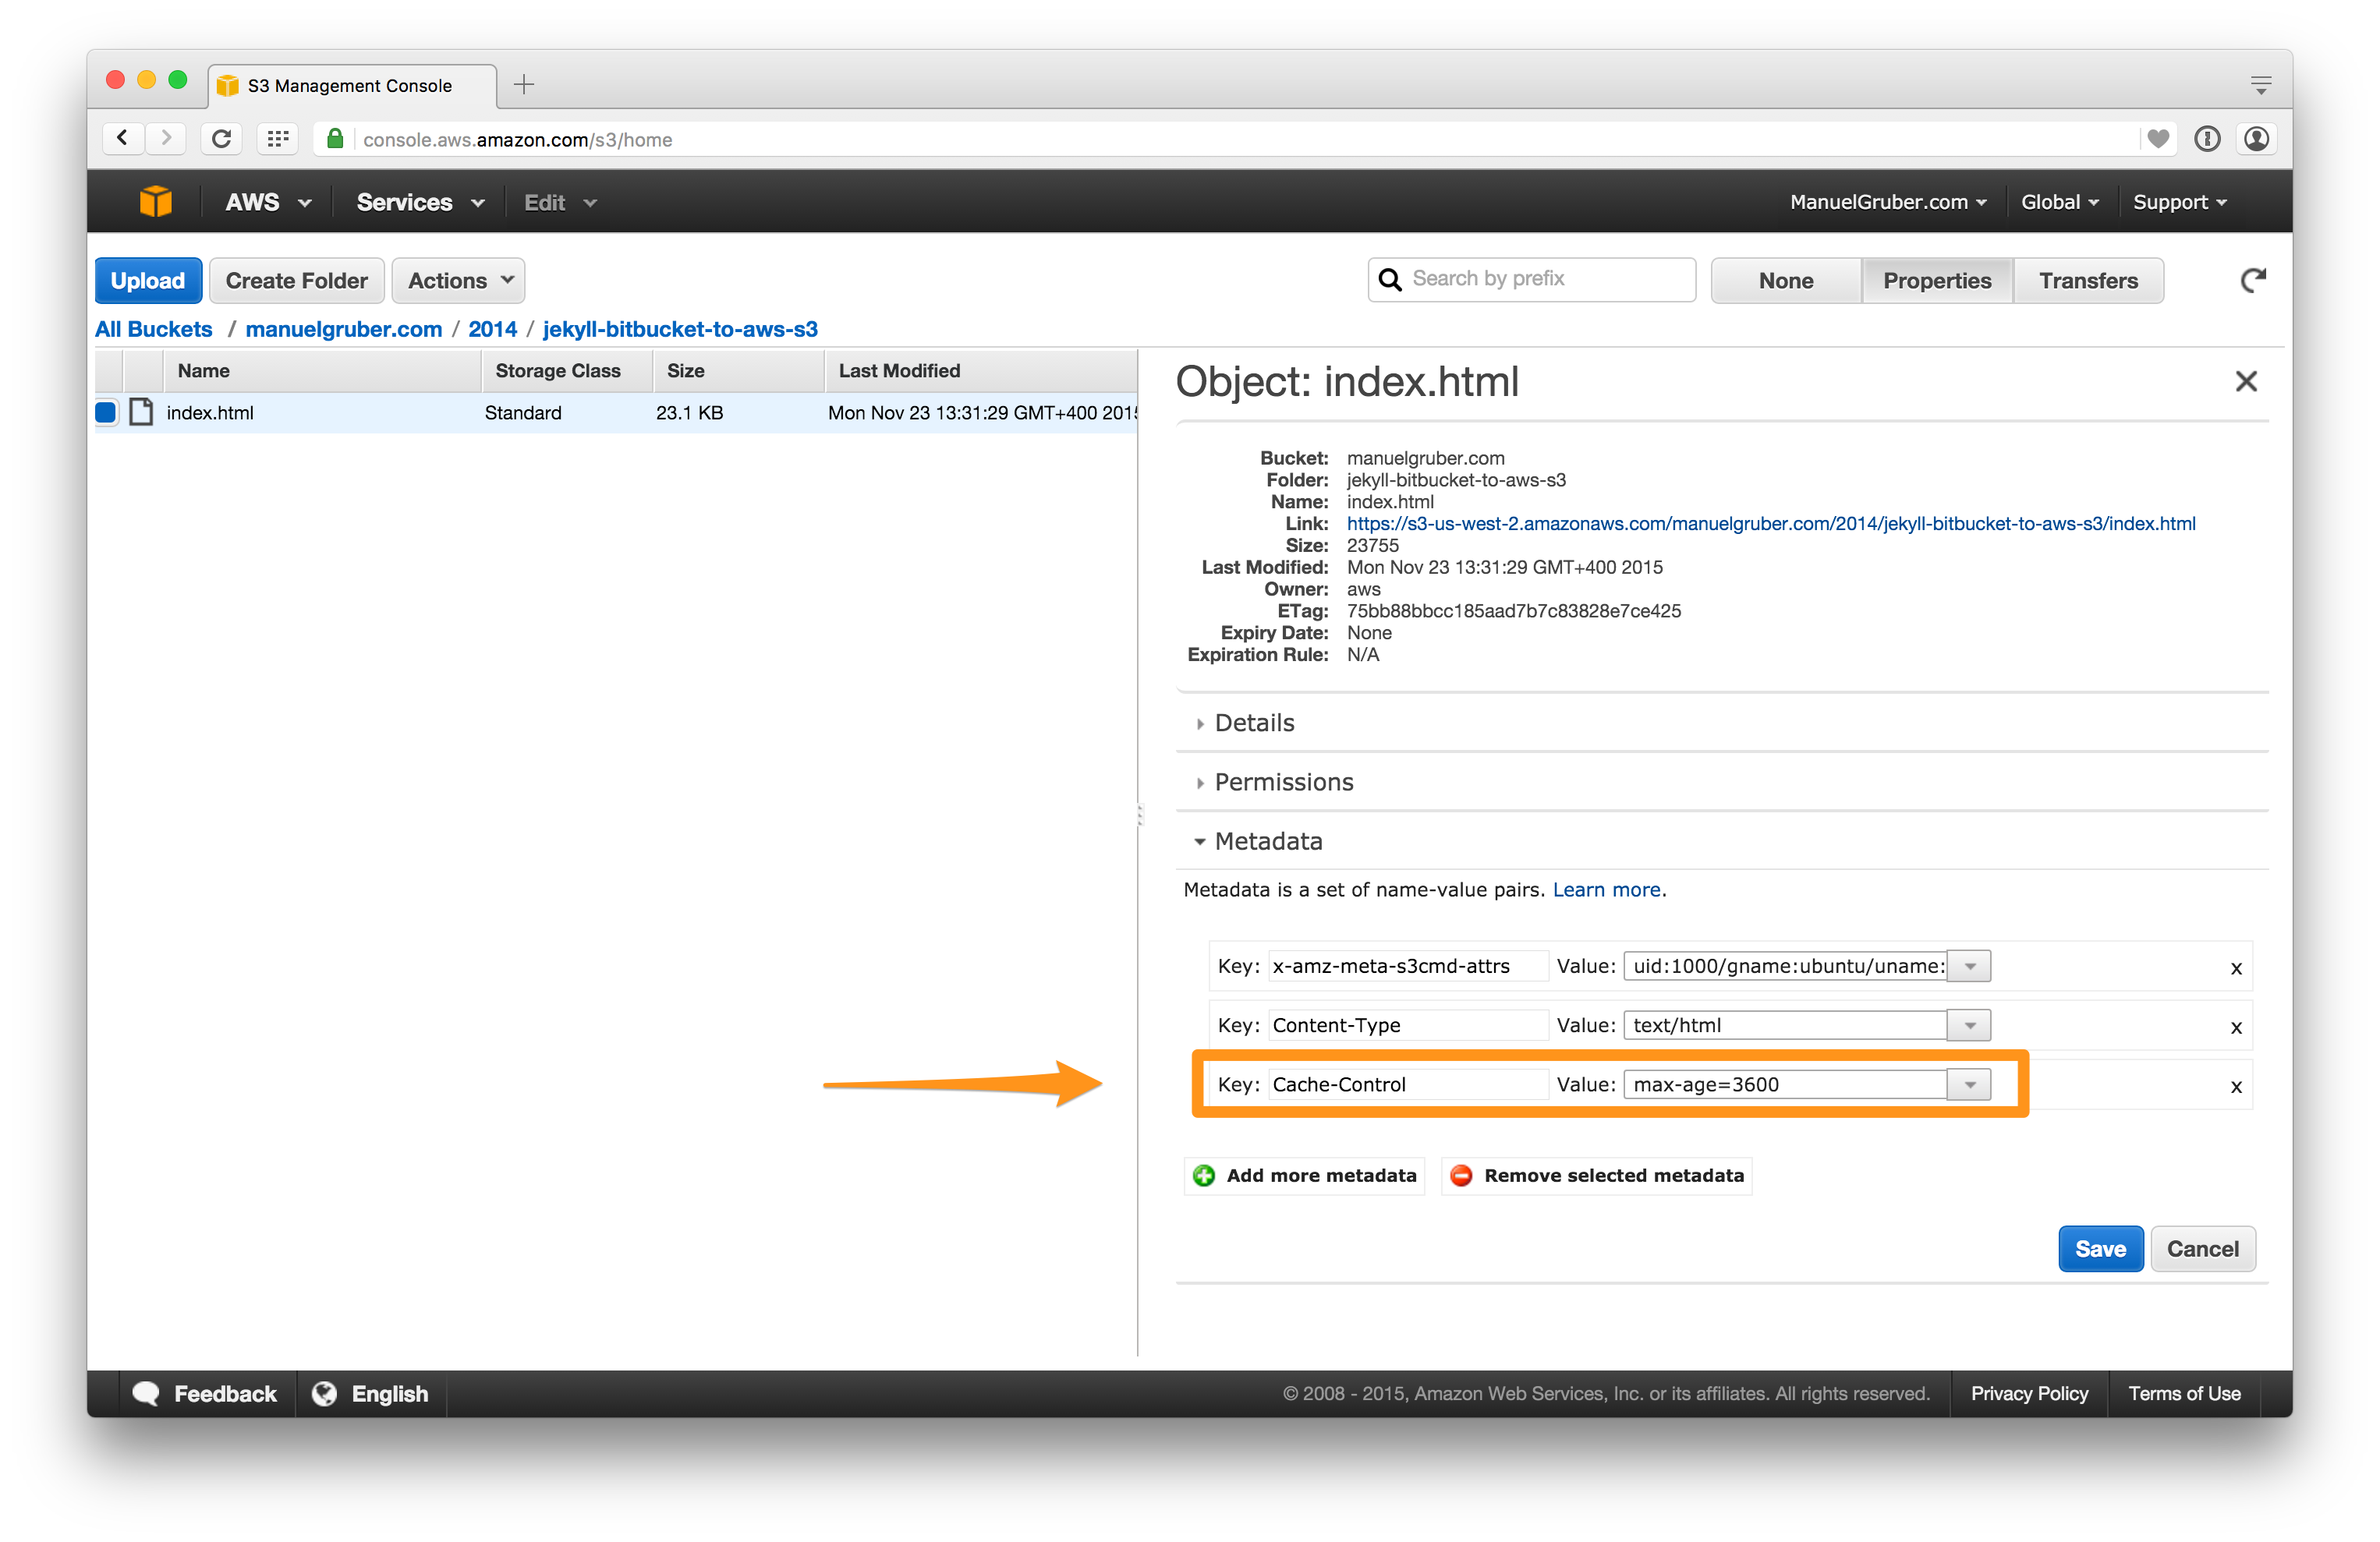
opts: --acl-public --add-header=Cache-Control:max-age=3600
Create the wercker.yml file in the repository root and copy the code above in it.
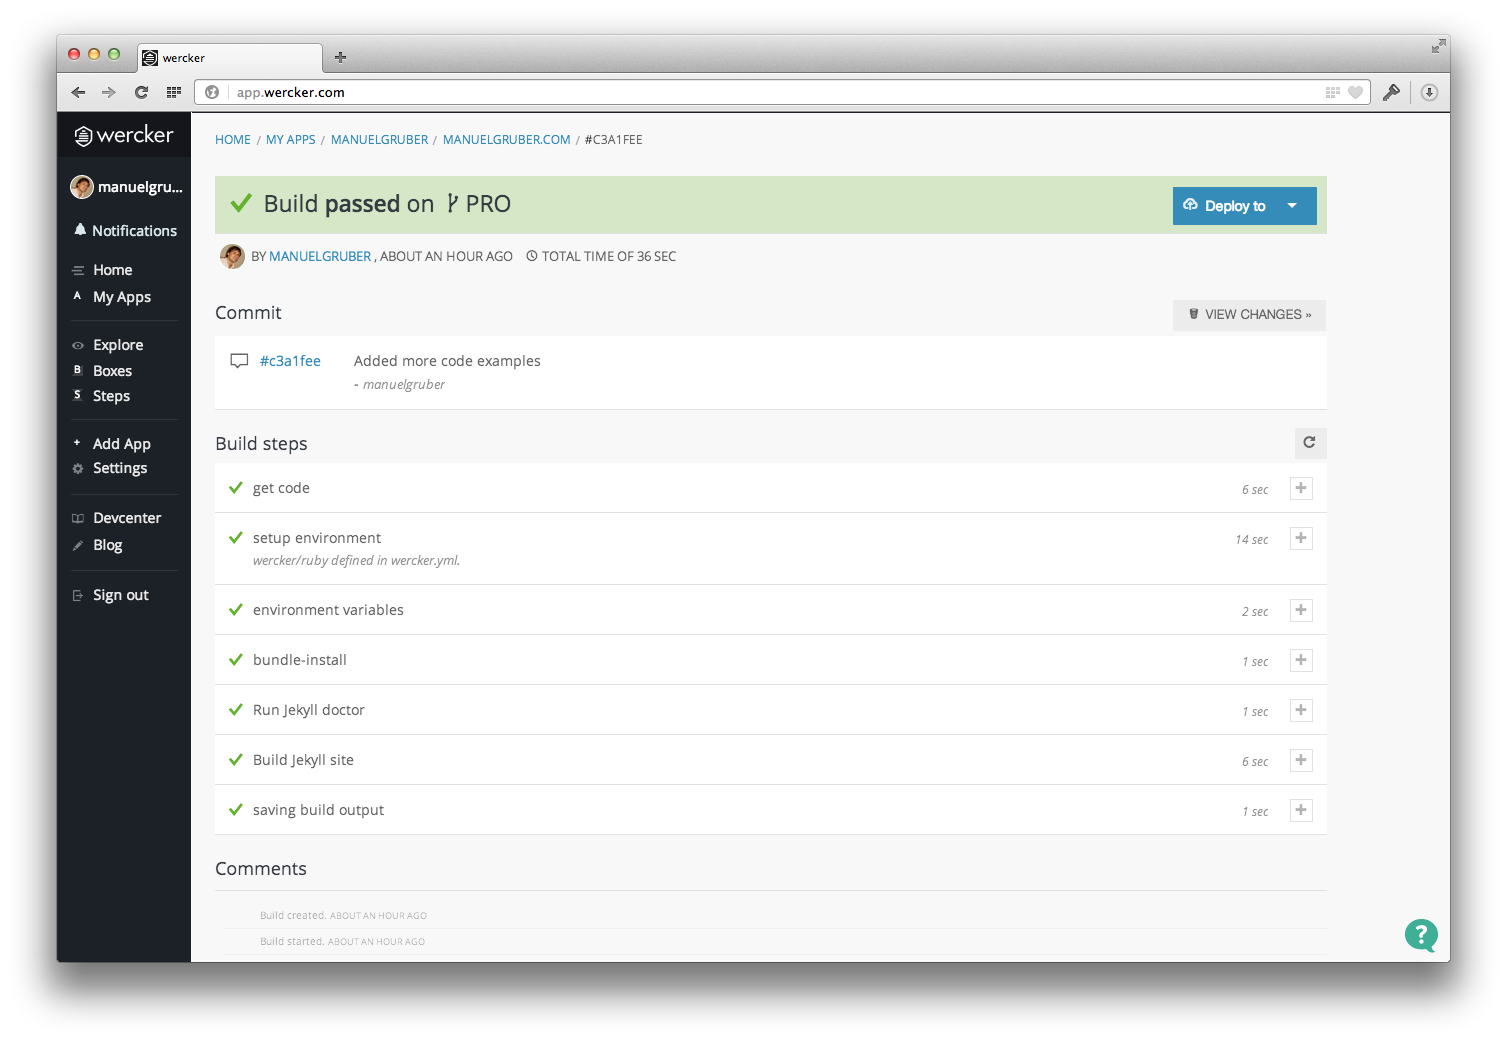
In the first part of the code the website will be build. The generation of the static website run through 3 steps. The first step just installs all needed dependencies. Secondly we run the Jekyll doctor command. It checks for errors and conflicts. Having different posts with the same resulting url for example, Jekyll just builds your website without any notification, but the doctor command detects the conflict and gives you more information about the error source. Finally the static files will be generated.
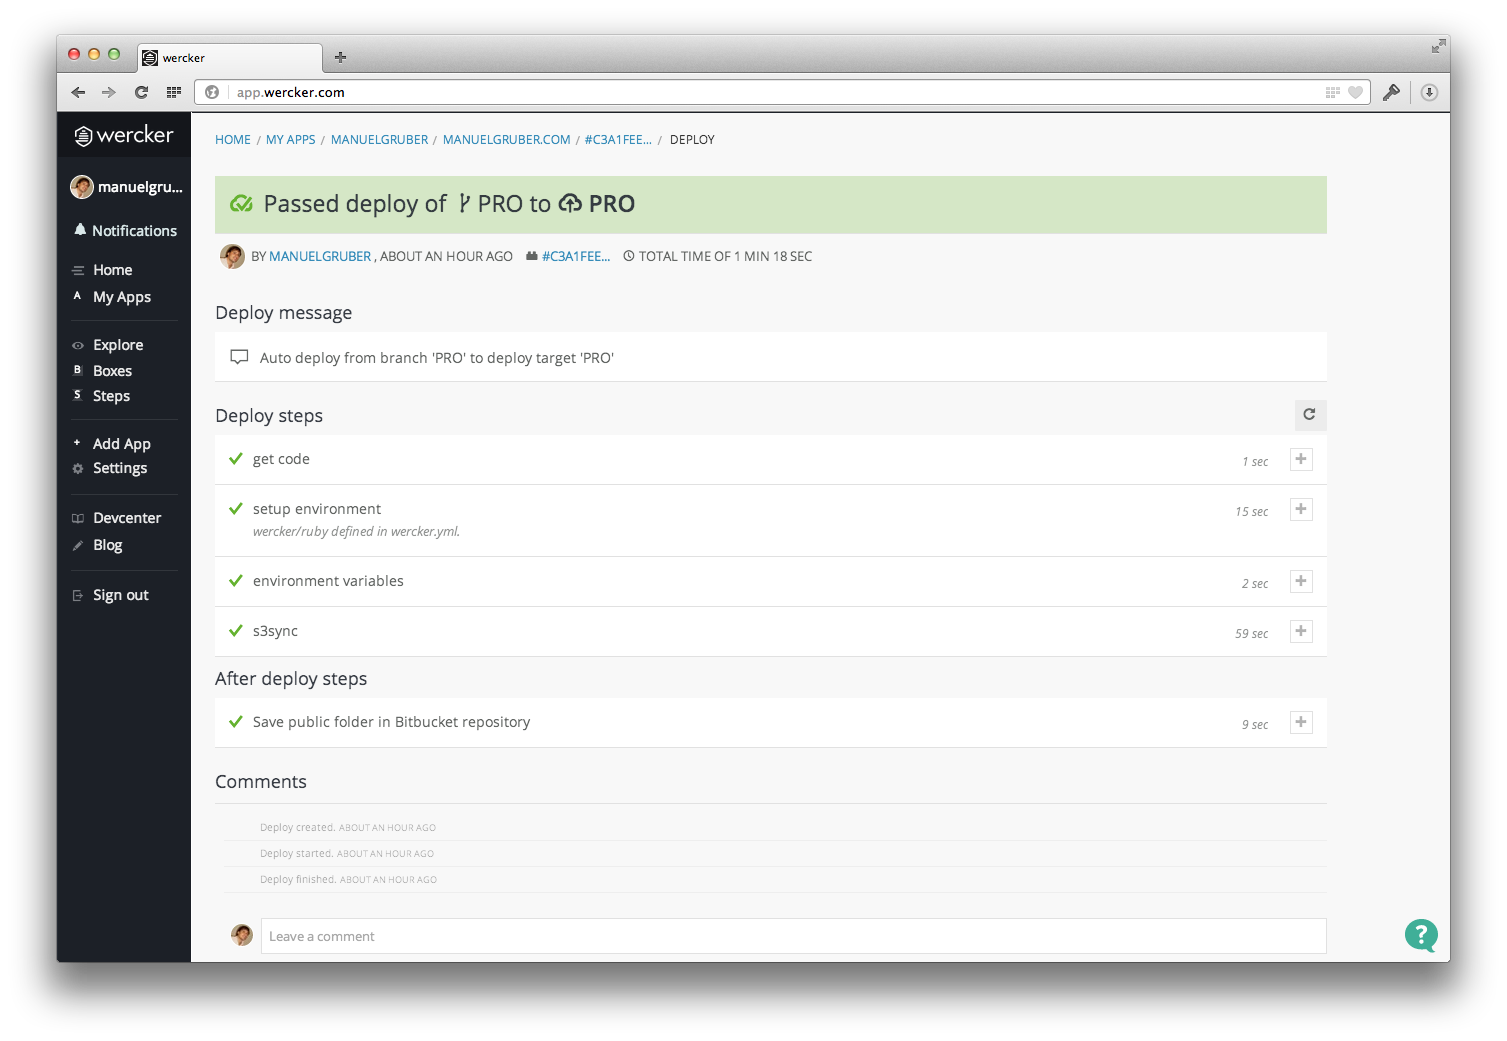
In the second part after the static files are ready, we copy the files to the S3 bucket. Here we use the environment variables specified before.
Add cache control headers
The website will be delivered by the AWS content delivery network (CDN) service CloudFront, which uses the S3 bucket as source. So end-users don’t have a direct connection to S3 buckets. One of the biggest advantages for using a CDN is their caching system with edge locations around the world. If no cache header is set for the source files, CloudFront update the cache every 24 hours. For a blog with e.g. two new posts within a day, as a consequence users will see none, one or all two new posts.
To be on the safe side we need to be sure every file in the bucket has a cache header. So I add --add-header=Cache-Control:max-age=3600 to the s3sync options.
Important notice for S3sync behavior: S3sync will only upload new and changed files to the S3 bucket. If you modify the cache-control settings the sync process will update the Http cache headers for changed files only. Unmodified files will remain the same and have the previous cache headers. If you have already a few files on S3, please delete all files and start a fresh sync to get the cache header for all files.
Summary
Following all steps in this you’ll get a end-to-end solution to publish your Jekyll blog from Bitbucket to AWS S3. If there are any open questions, please send me an email and I get back to you.