Introduction
During the last months I implemented the Google Tag Manager (GTM) for some companies. Here I put together some basic information. Supporting you to understand GTM and the structure behind better.
Tag Management and third party code on your webpage
Tag Management software is not necessary to run a successful website. A lot of online businesses are running without it and doing well for years. But they make your life much more easier.
Nowadays webpages and mobile apps are using a lot of different analytics software, tracking codes and other third party codes. Especially e-commerce companies have many partnerships, where they integrate tracking codes. Online-shops sometimes include up to 20 tags or tracking snippets on their checkout and success page. Here tag management comes into place and provide some advantages:
- Control all tags in one place (instead of many different code snippets within your source code)
- Control tag execution
- Manage tags in real-time without release circles (Marketing, Sales and Business Development departments will thank you)
- Don’t use developer time (to integrate and disable tags)
- Increase the loading speed of the website (because the software loads all tags in the best async noN-blocking way)
Google Tag Manager in detail
Google Tag Manager consists of different parts and here are detailed descriptions.
Container
The container is the basic constuct in GTM. Instead of adding many different code snippets to the source code, only the container code will be added and will replace all other snippets.
To move a website without tag management to Google Tag Manager, you need to add the container code to html code, organize your tags in the GTM webinterface and remove all tags (except the container tag) from the source code. The removal is very important, otherwise the code will be executed twice. That can cause problems like incorrect reports. Traffic partners with integrated tracking codes get 2 acknowledgement notifications for every order transaction.
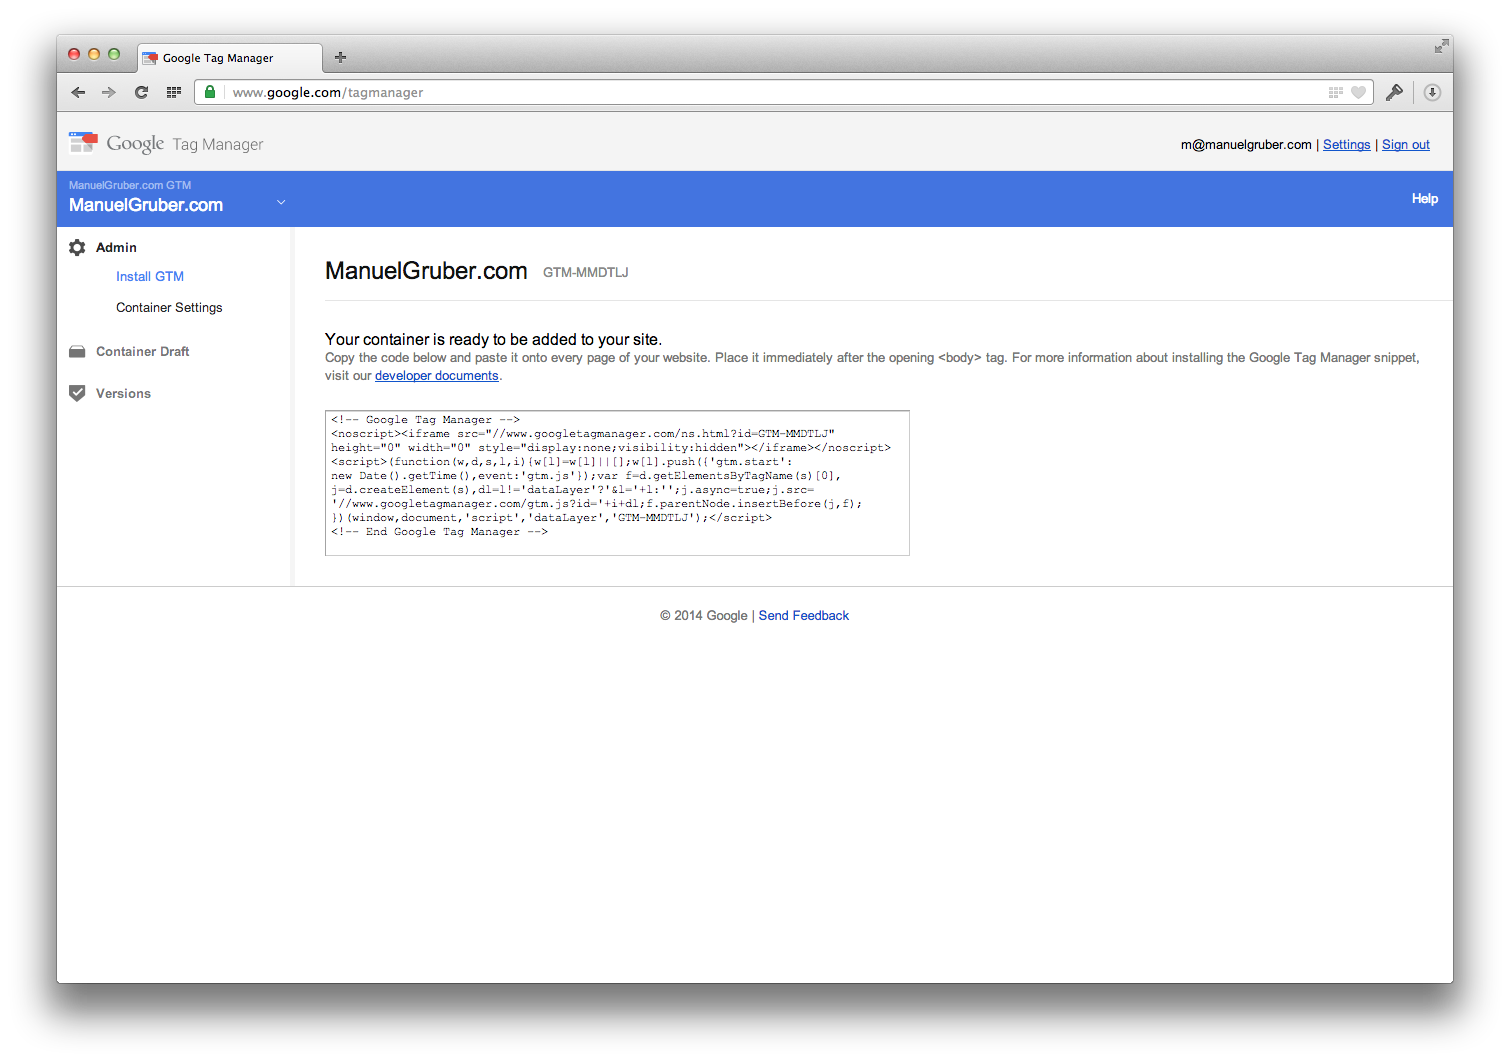
GTM Tags
Tag is the generic name for tracking codes and other third party code on a website. It combines web analytics tags, advertising conversion tags, Javascript code, etc. The container is a tag, too. It will be included on the website like any other one. But it has the special function to manage and load the tags defined in GTM.
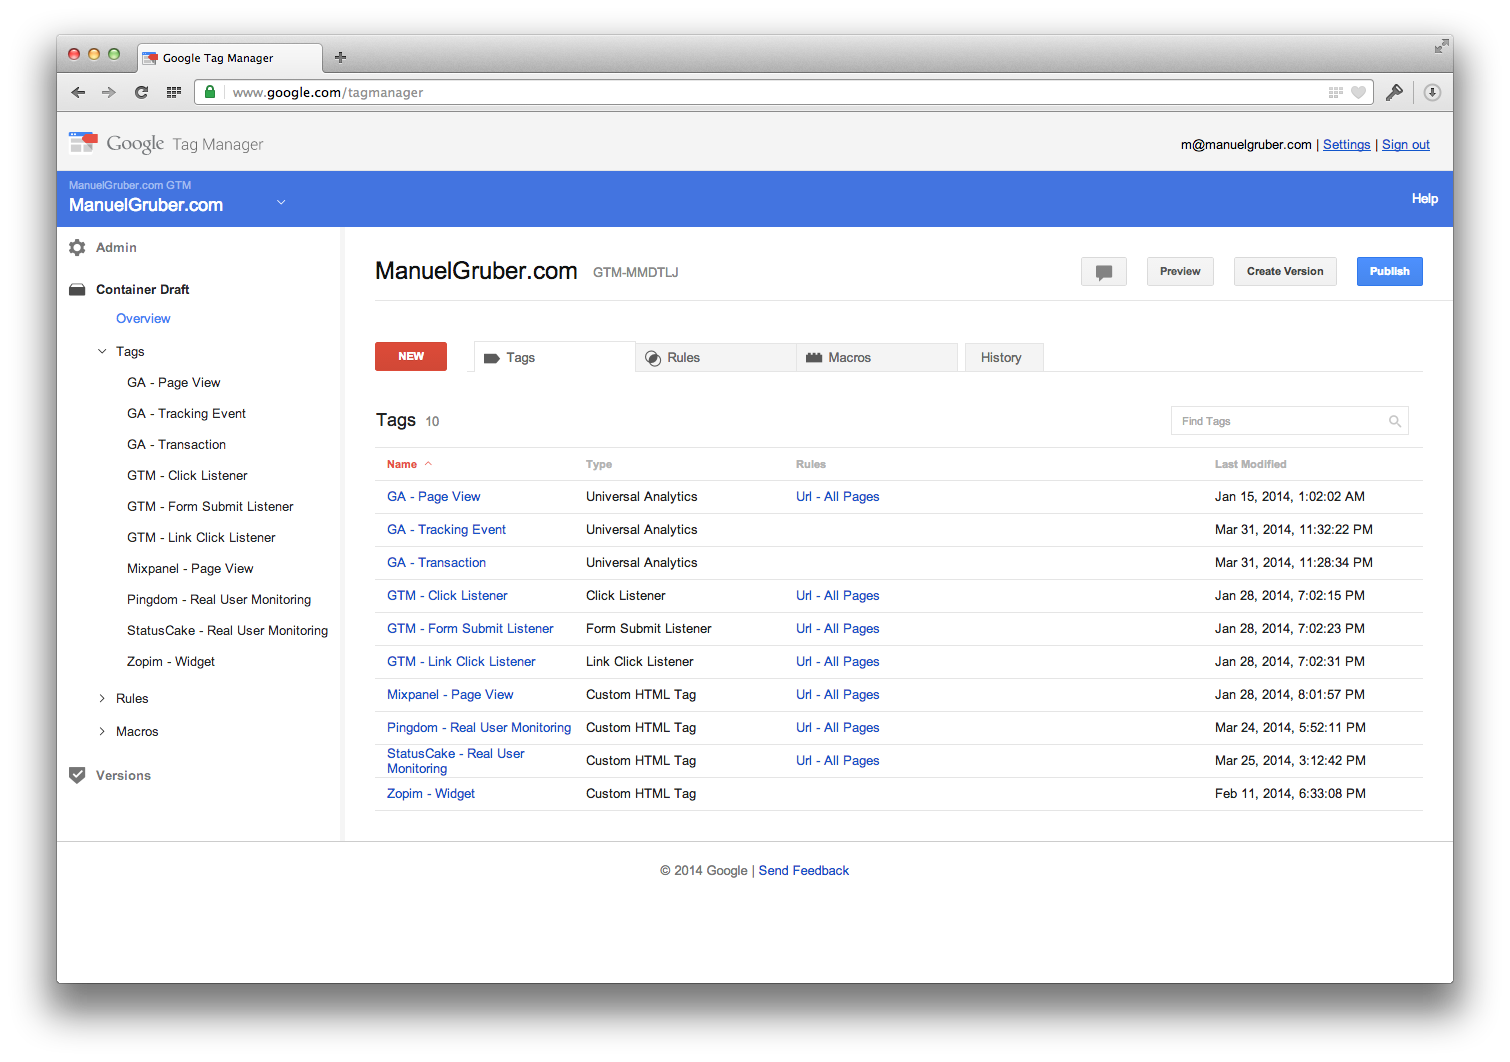
GTM Rules
A rule defines if a tag gets fired or not. While creating a tag in GTM you can select when it executed or blocked. You just add firing rules or blocking rules.
On the screenshot I added a rule example only for articles of the current year and users logged in with an email address from BMW and my domain.
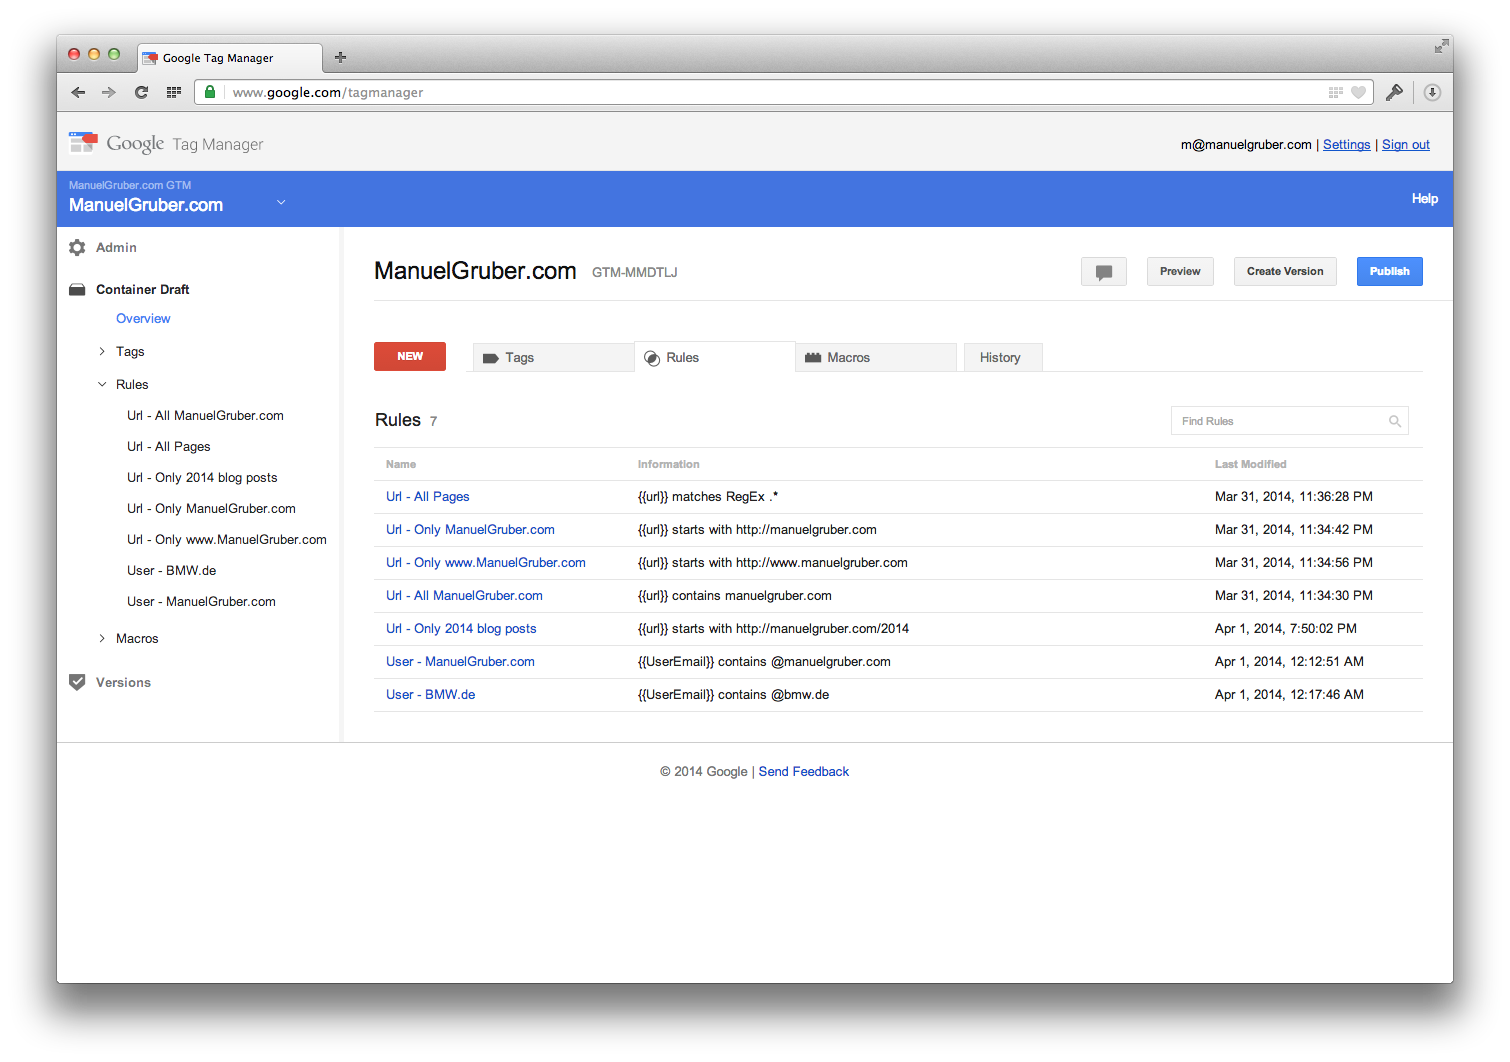
GTM Macros
The shortest definition: Macros store data. There are different ways to store information. GTM provides already a wide range of different macros and helpers. It’s easy to parse information from Javascript and your DOM elements. And of course custom values will be passed through the dataLayer (later more).
The stored data can be used in tags and rules. Tags use marcos to pass information (e.g. about the logged in user) to other services. You can push user data like userid, user email address or booked service plans to chat tools like Zopim or Olark. In the chat tool you can priorize your high-value key clients over not-paying customers. And rules use marcos to check if a condition is met. For example you can show a pop up, where users can subscribe to your email newsletter, to visitors from Google search.
The concept of dataLayer and dataLayer.push
The data layer is a JavaScript construct in the client. It holds all information you want to pass to GTM and forward the data to other software tools. The website specifies in the source code what should be in the data layer. There are two different types to store data.
| dataLayer | dataLayer.push | |
|---|---|---|
| Page view based | Event based | |
| Description | Variables are defined at the page load and can’t change until the next page view. | When an event occurs after the page load, the website pushes the information to GTM. |
| Code location | Before container tag | Everywhere (dependent on the event) |
| Use cases | Page title, page category, page last update, user id, user email, user photo, user register date, user pricing plan | Events in Google Analytics, button clicks, form submission, transactions |
Example for dataLayer:
<script>
  dataLayer = [{
    'PageTitle': 'Home',
    'PageCategory': 'Detailview',
    'UserId': '10533594',
    'UserEmail': 'name@domain.com',
    'UserFirstName': 'Manuel',
    'UserLastName': 'Gruber',
    'UserPhoto': 'http://manuelgruber.com/userphoto.png',
    'UserPlan': 'Premium'
  }];
</script>
Link example for dataLayer.push:
<a href="http://domain.com/product/436345/like"
  onClick="dataLayer.push({
    'event': 'Products: Liked',
    'eventCategory': 'Products',
    'eventAction': 'Liked',
    'eventLabel': 'ASOS dress',
    'eventValue': '436345'
  });"
>
Like product
</a>
How to use Google Tag Manager
Make the data layer information available in GTM
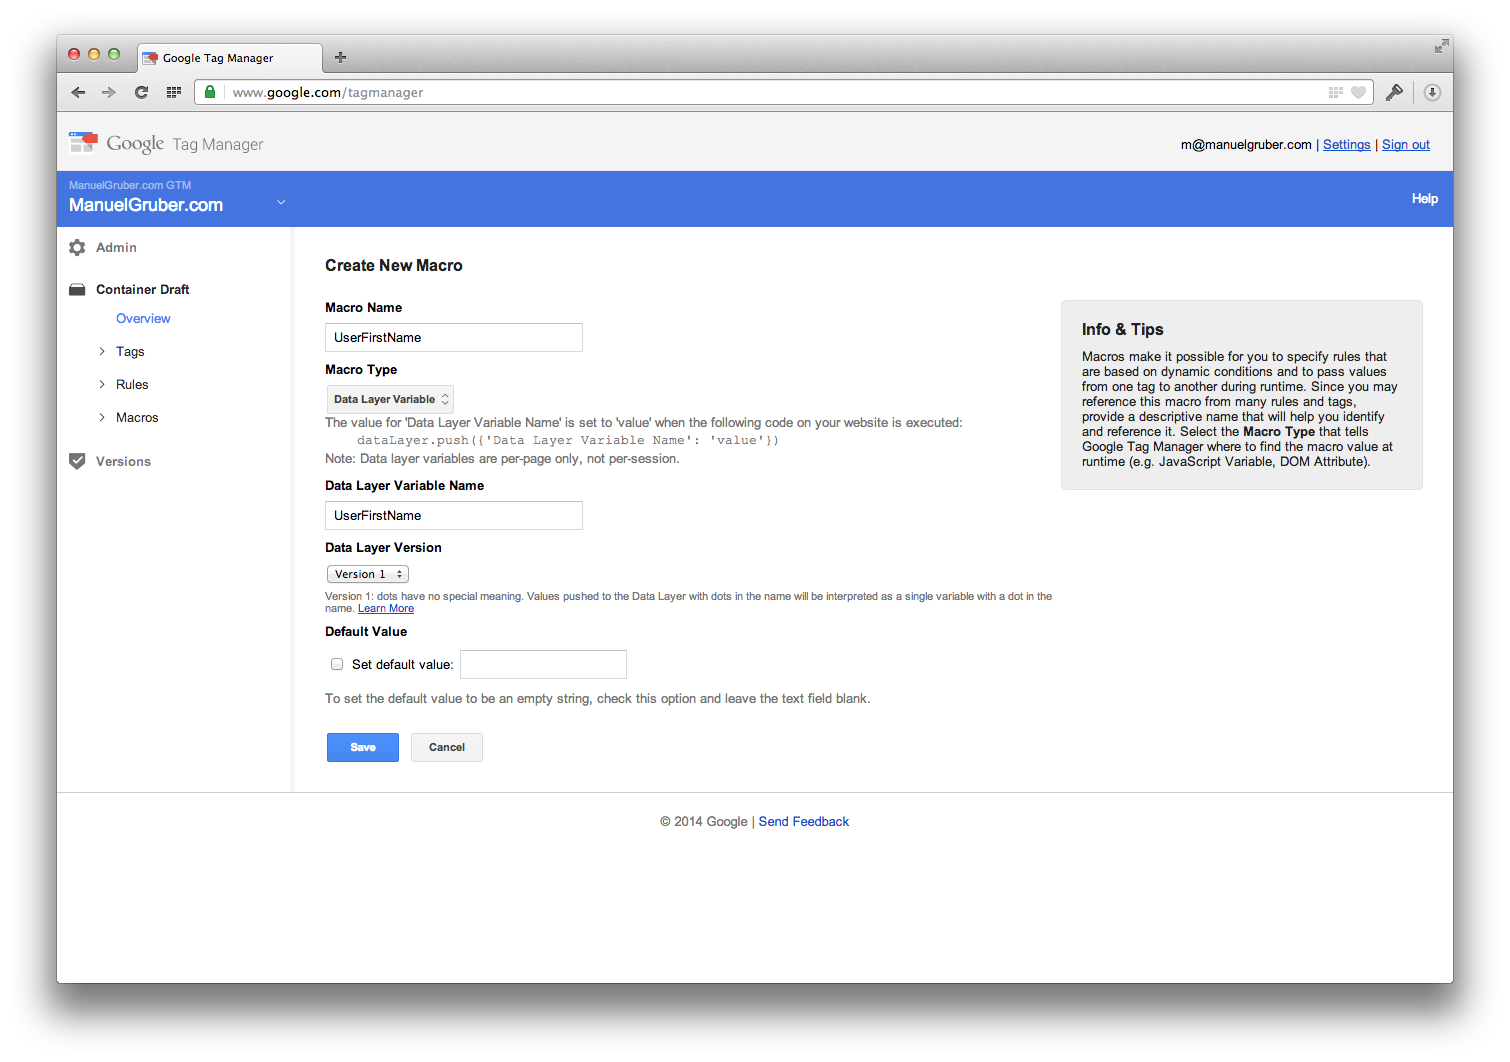
If the code is integrated the data is not yet available for GTM and other software tools. You need to create a marco for every data layer variable.
Here are already added the marcos for events:

For every data layer variable you need to create a macro in the webinterface:
Container draft and versions
With Google Tag Manager it’s easy for users to break tracking codes on their websites. In order to protect your production environment, GTM has integrated version control and testing tools.
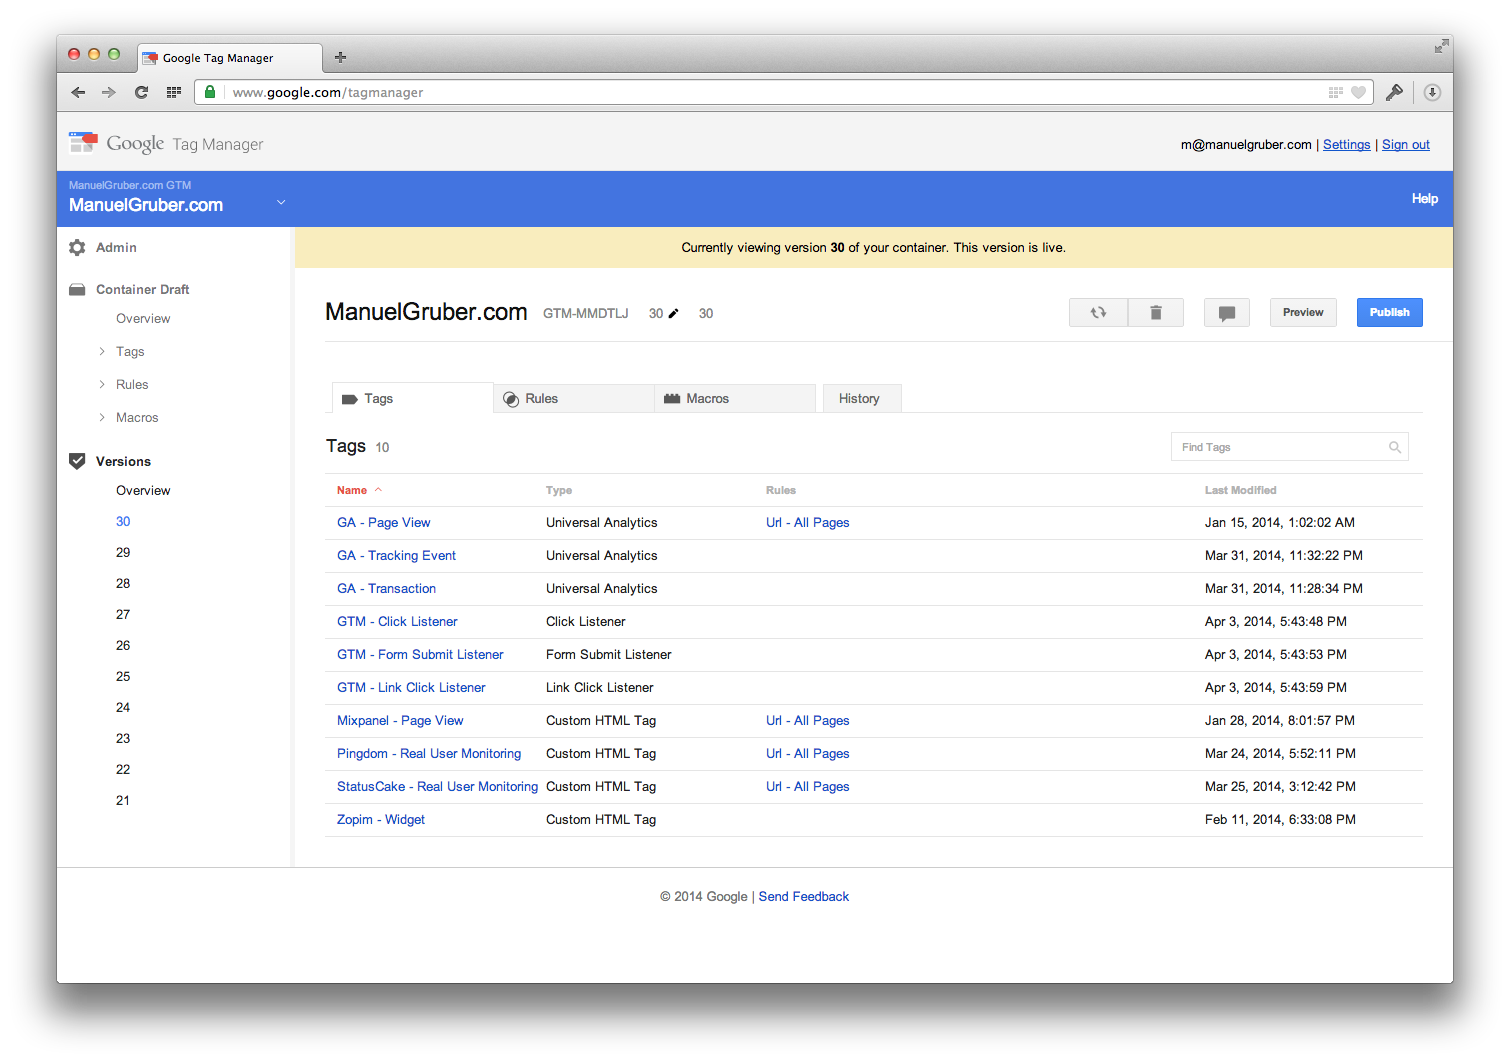
All changes will be stored in a draft container first. When everything is in place, create a new container version from the draft and publish the new version. In the following example I created container version 30.
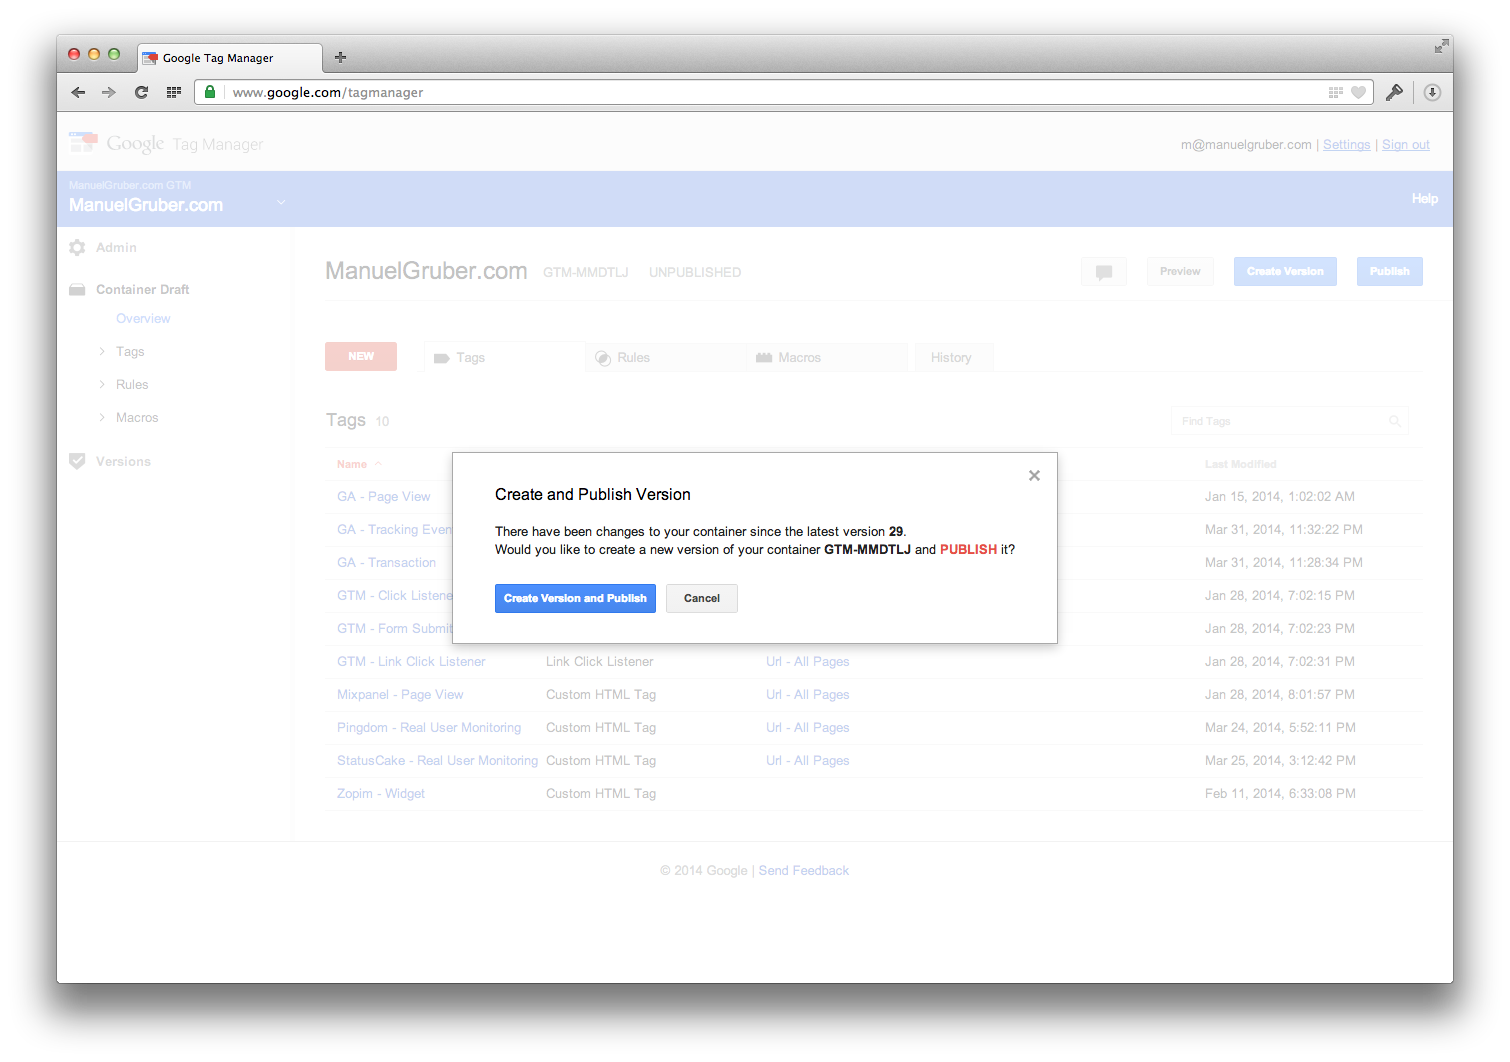
And then the container is published.
Debug mode
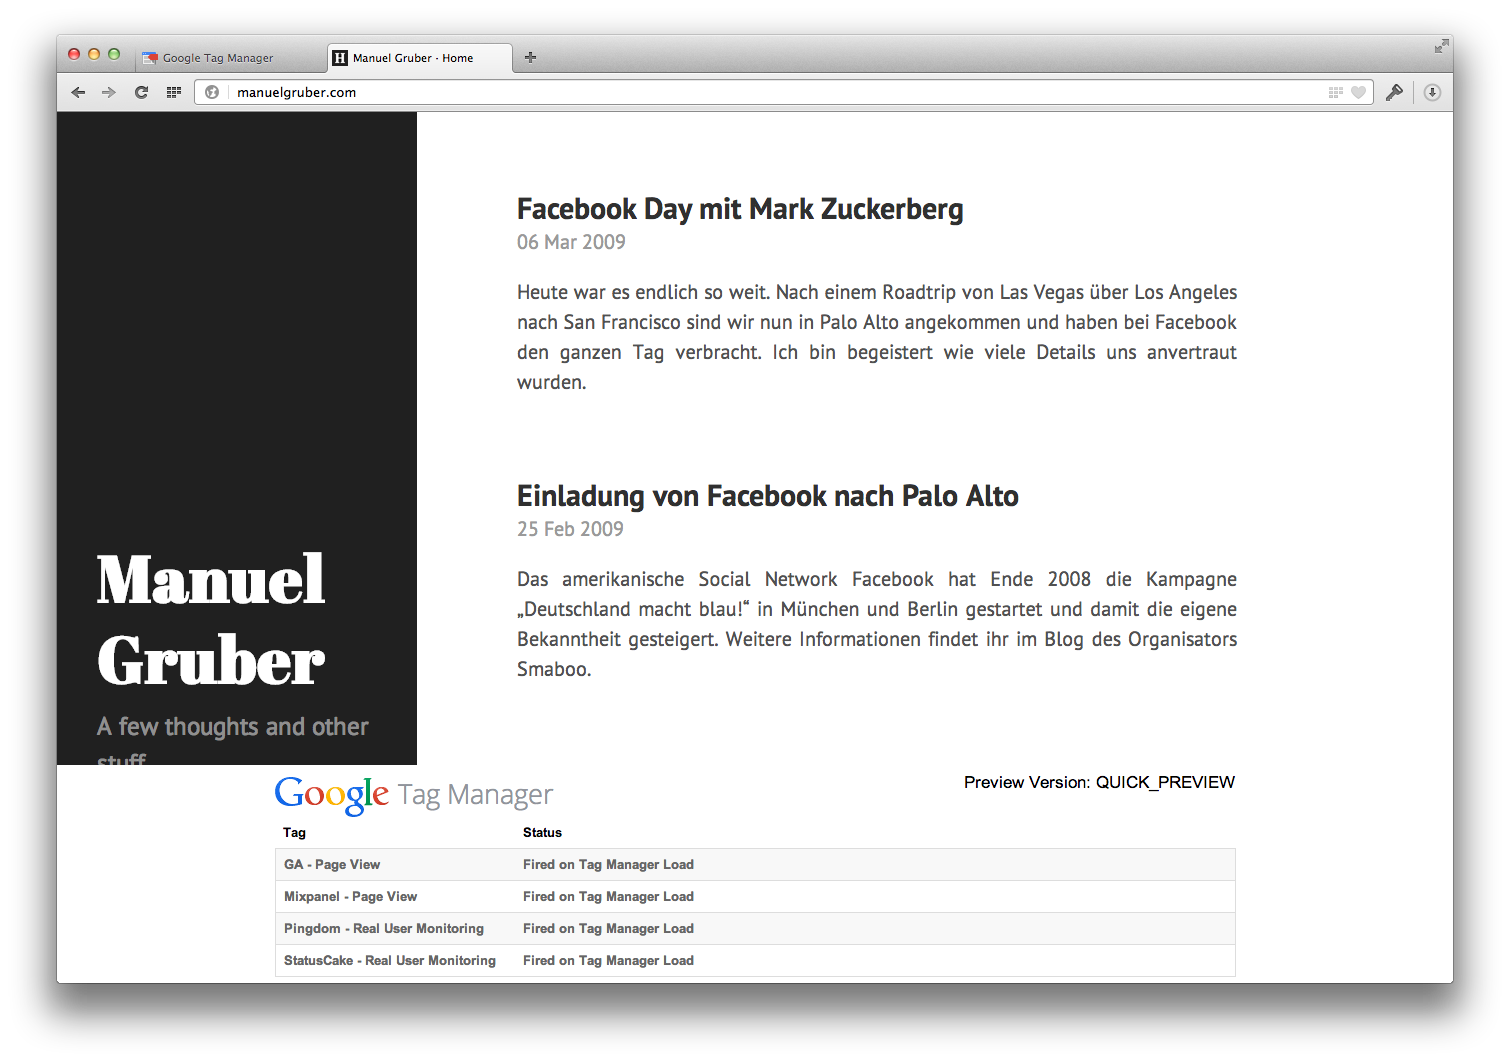
With GTM you can test your tags live on your website and see what happens in the background. To do that go to your container draft, click on Preview and on Debug in the popup.
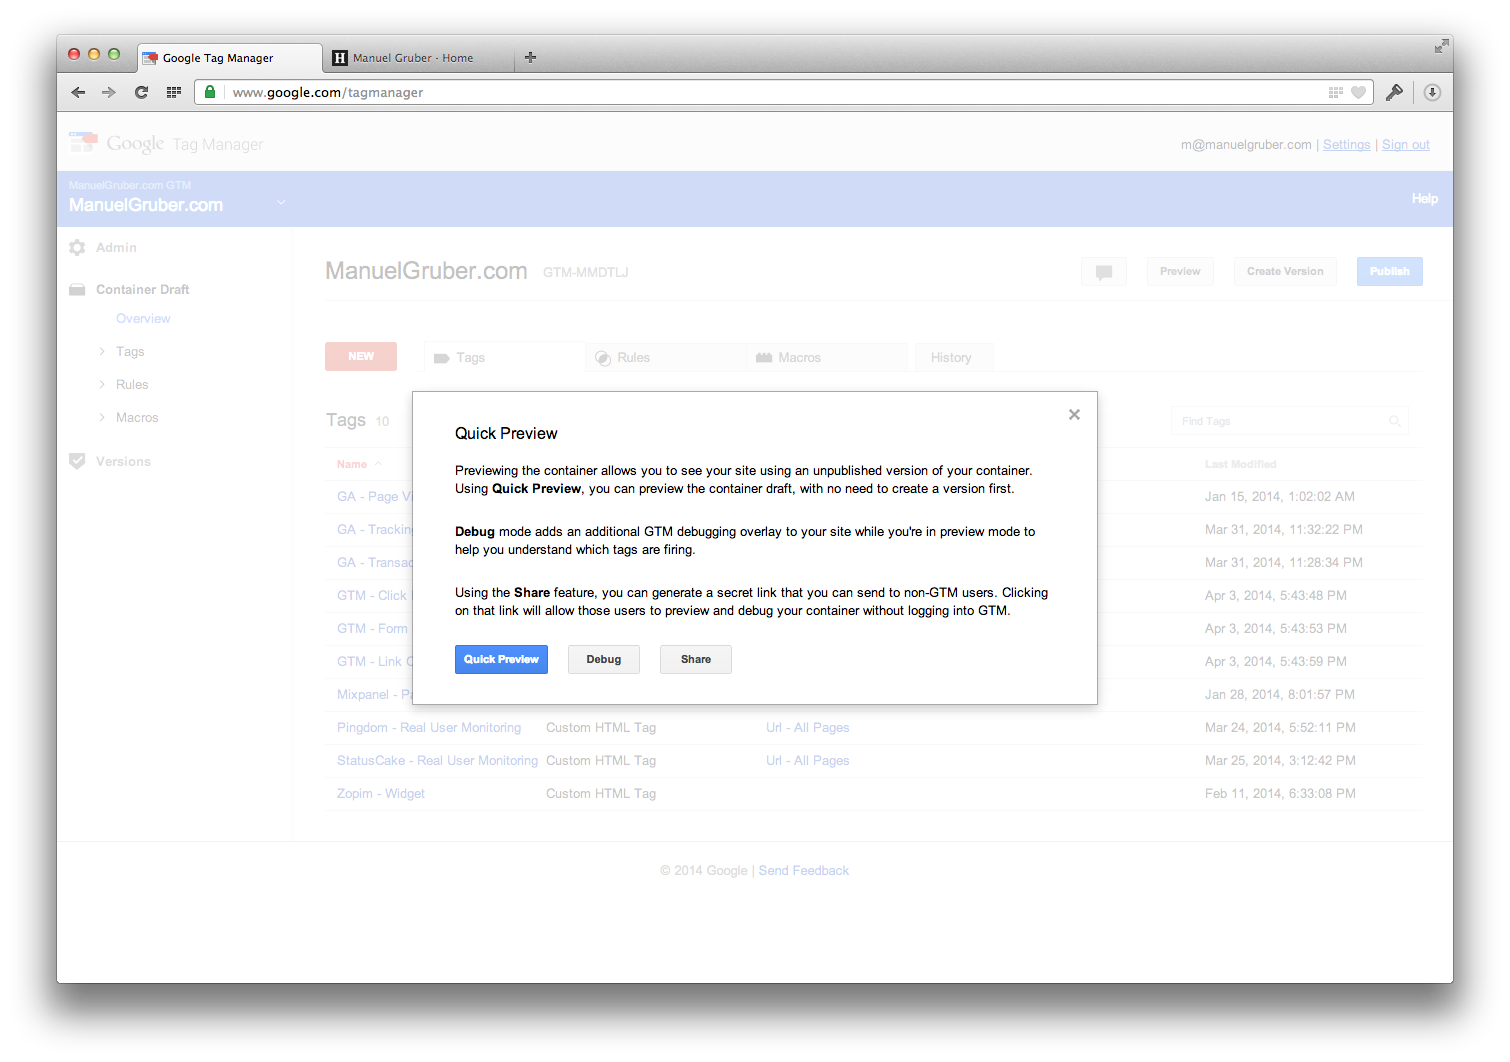
Open your url in a new browser tab and you see a list of fired tags when you’re using the website.
Use cases & examples
Google Analytics
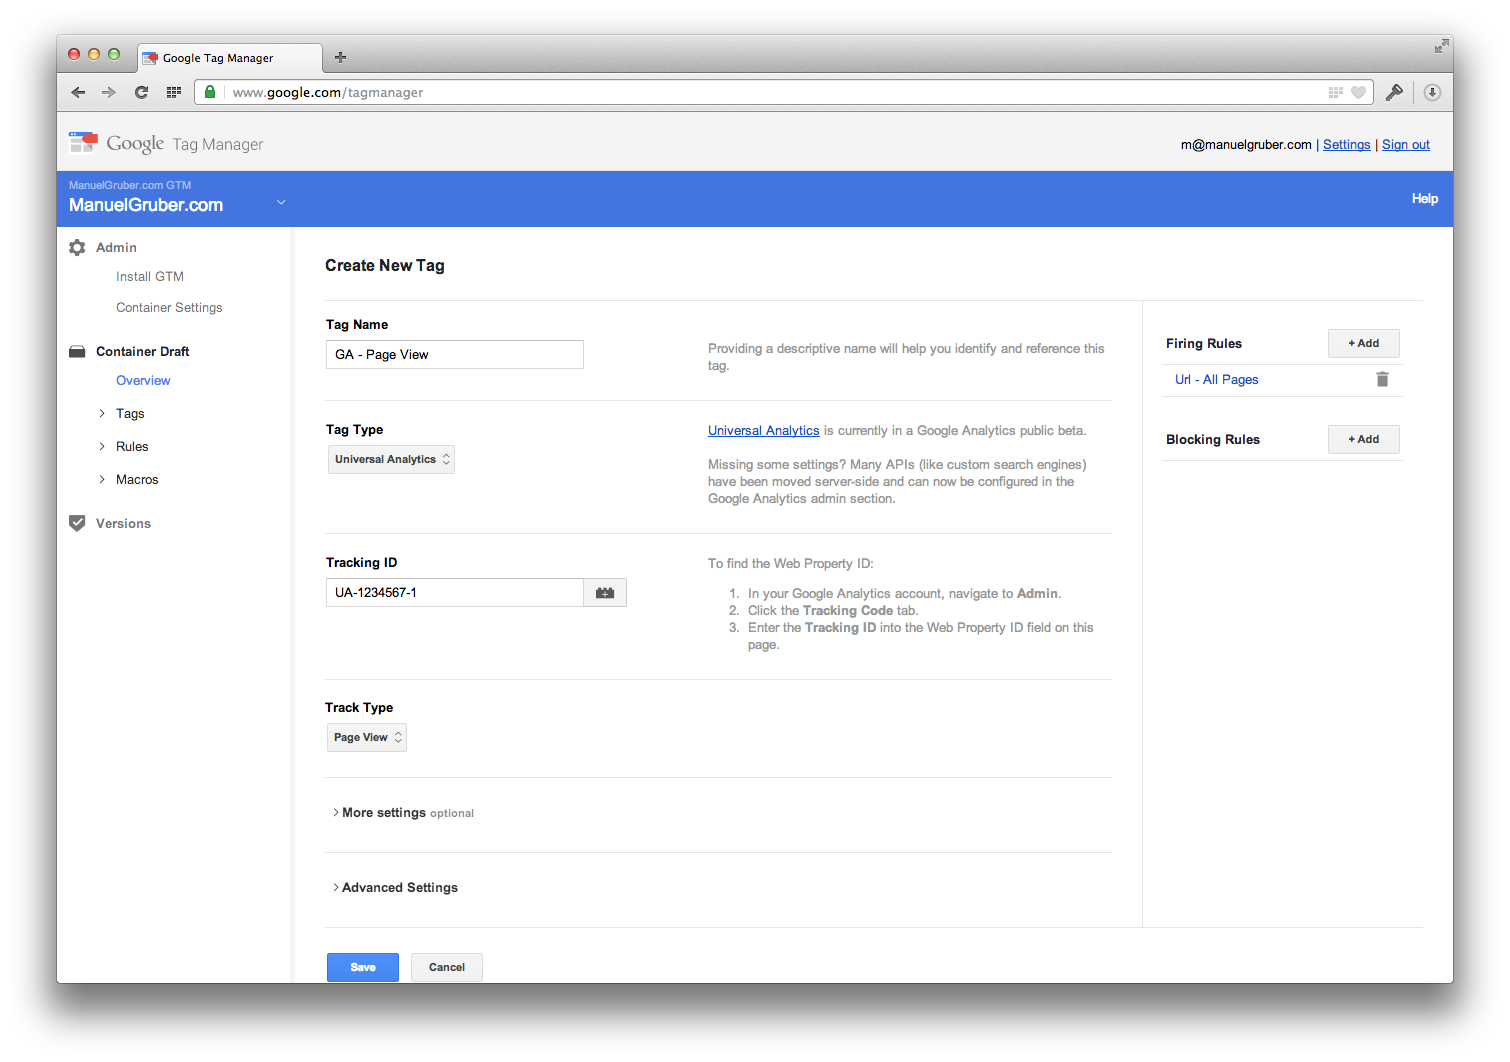
To add Google Analytics with GTM, create a new tag and fill in the details from the next screenshot. Please replace the Tracking ID with your UA number from GA and select a firing rule. You don’t need to add special code to our source code, everything else will be handled by GTM.
Events for Google Analytics
To track events, the common way is to integrate dataLayer.push to your source code. You see one example above. Here are the steps for a successful integration:
- Create a new macro with the name event and the type “custom event”, if it’s not already there.
- Create 4 new macros with type “data layer variable” and option “version 1”. Macro name and Data Layer Variable Name must be eventCategory, eventAction, eventLabel, eventValue and eventNonInteraction.
- Create new rule for events.
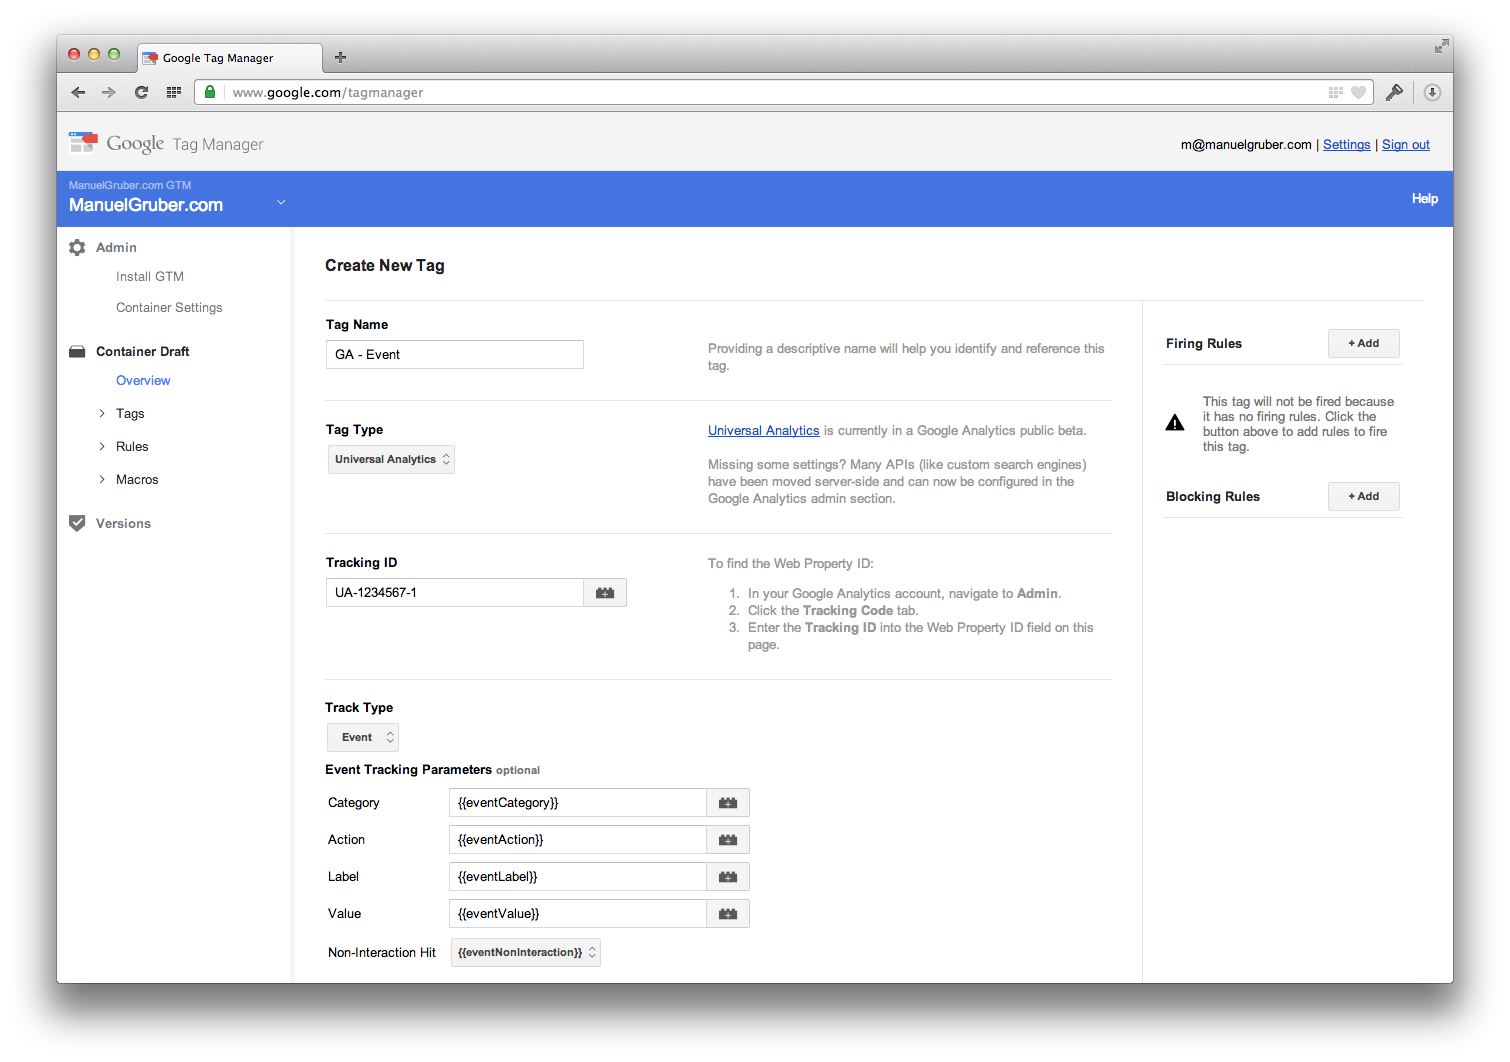
- Like in the following screenshot, create new tag for Google Analytics and select as track type “event”. And use the macros as “event tracking parameters”.
- Publish container.
Next
Now you’ve a basic understanding of Google Tag Manager and know how and why it works.
An interesting question is for what you can’t use Google Tag Manager. And as next steps you can use special GTM tags, auto event tracking and integrate other tracking tools like Mixpanel.